How to Integrate with ClickFunnels
This will allow you to track your visitors on any ClickFunnels pages you have and integrate capturing emails, Facebook Messenger subscribers, or Web Push Notification subscribers, or any combination of all 3.
Step 1: Your must first obtain your Brand Avatar's Tracking Code by following the steps here: https://smartengage.com/knowledge-base/books/faq/page/where-can-i-find-my-brand-avatars-tracking-code
Step 2: Once you have your tracking code go into your ClickFunnels account and click to view your funnel. Once on this page click on the "Settings" tab.
Step 3: On The Settings tab locate the section labeled HEAD TRACKING CODE and Paste the SmartEngage tracking code into that section
Make sure to click Save at the bottom of the ClickFunnels settings page to save the tracking code:
Step 4: Create your Custom HTML Lead Magnet Form within SmartEngage
On the left navigation area click on "Lead Magnets"
Step 5: On the top right of this page click on the button for "New Lead Magnet"
Step 6: Select Opt-In Form and click Next
Step 7: Select Email in the Form type dropdown.
And then select HTML Form
Step 8: Configure Your Opt-In accordingly.
For a full video walkthrough please watch this video below:
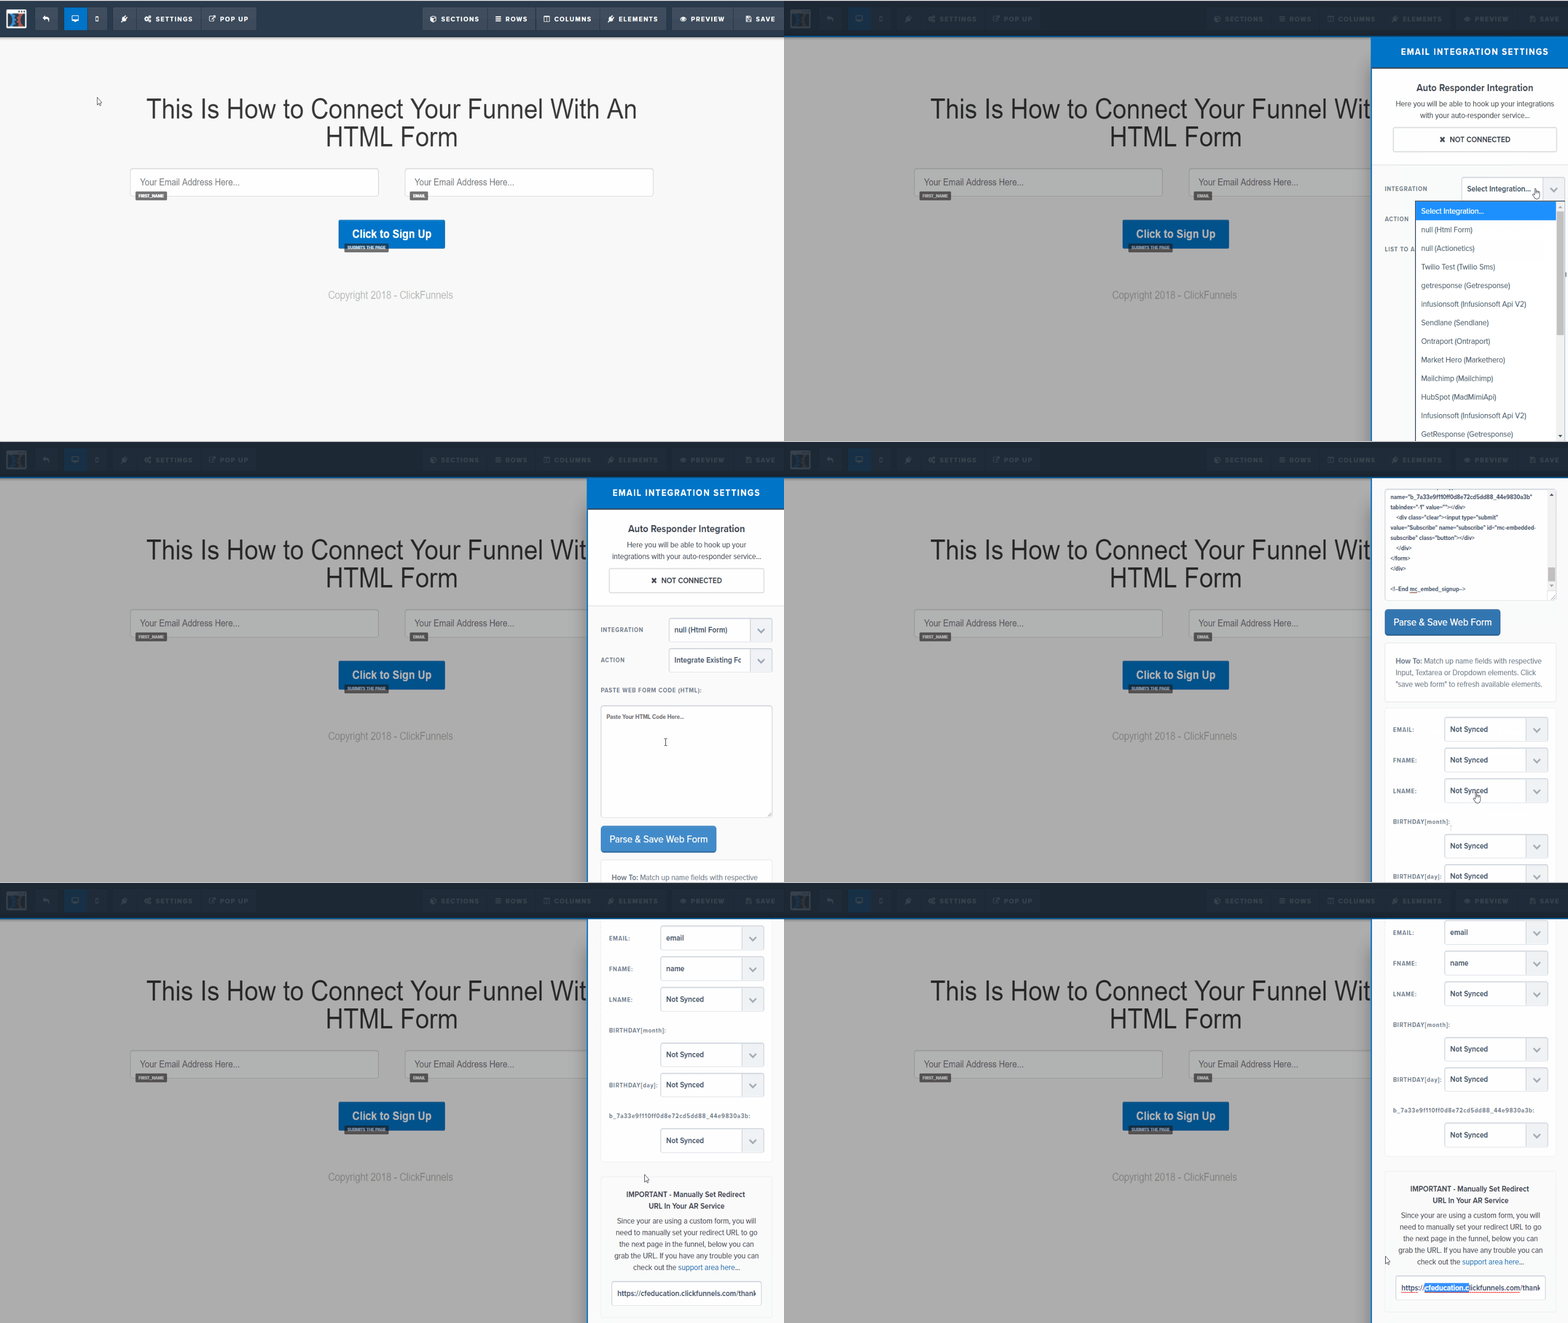
Step 9: Add The Form To Your ClickFunnels Funnel
- From within your page editor, navigate to "Settings."
- Click "Integrations."
- For Integration, select "null (HTML form)."
- For Action, select "Integrate Existing Form."
- Paste your HTML form you got from SmartEngage
- Click "Parse & Save Web Form."
- Match up your ClickFunnels form fields with your autoresponder fields.
- Scroll down and manually set your Redirect URL (optional; by default, this will be set to the next page in your funnel).


No Comments